Here is a guide for managing access to Google Analytics data. Use it to analyze websites effectively and control who can see which data. Setting up different access levels allows you to regulate how other users use the information: you can either extend access or restrict it to the necessary level.
Access levels
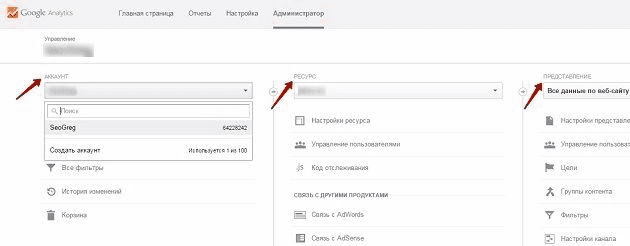
New users can be assigned one of the following access levels:
➤ Presentation level
➤ Resource level
➤ Account level
Different access levels are useful if you want to provide a user with the necessary information while limiting their ability to view data across the entire account or property.
How to grant access to a user
The process of adding a new user in Google Analytics is as follows:
➤ Log in to your Google Analytics account.
➤ Go to the Admin tab and select the account, property, or view you need (these are the access levels you can grant to a new user).
➤ In the corresponding column (account, property, or view), click “User Management.”
➤ In the “Grant Permissions” field, enter the Google account email of the new user.
➤ Select the required permissions or a combination of them: “Manage Users,” “Edit,” “Collaborate,” “Read & Analyze.”
➤ If you want to notify the user about the access, check the box “Notify new users by email.”
➤ Click the “Add” button.
Done! The new user will now have access to the specified information according to the permissions you selected.